Google Cloud Storage Data Lake
Many FinTechs, financial institutions and other platforms have built (or are building) bespoke analytics/reporting solutions for various proprietary use cases. If your enterprise likes to leverage large analytical data, the Hurdlr API has you covered via its Data Lakes product.
The instructions below explain how to set up your Google Cloud Storage bucket as a Hurdlr API Data Lake.
1. Configure a service account for programmatic access to the bucket
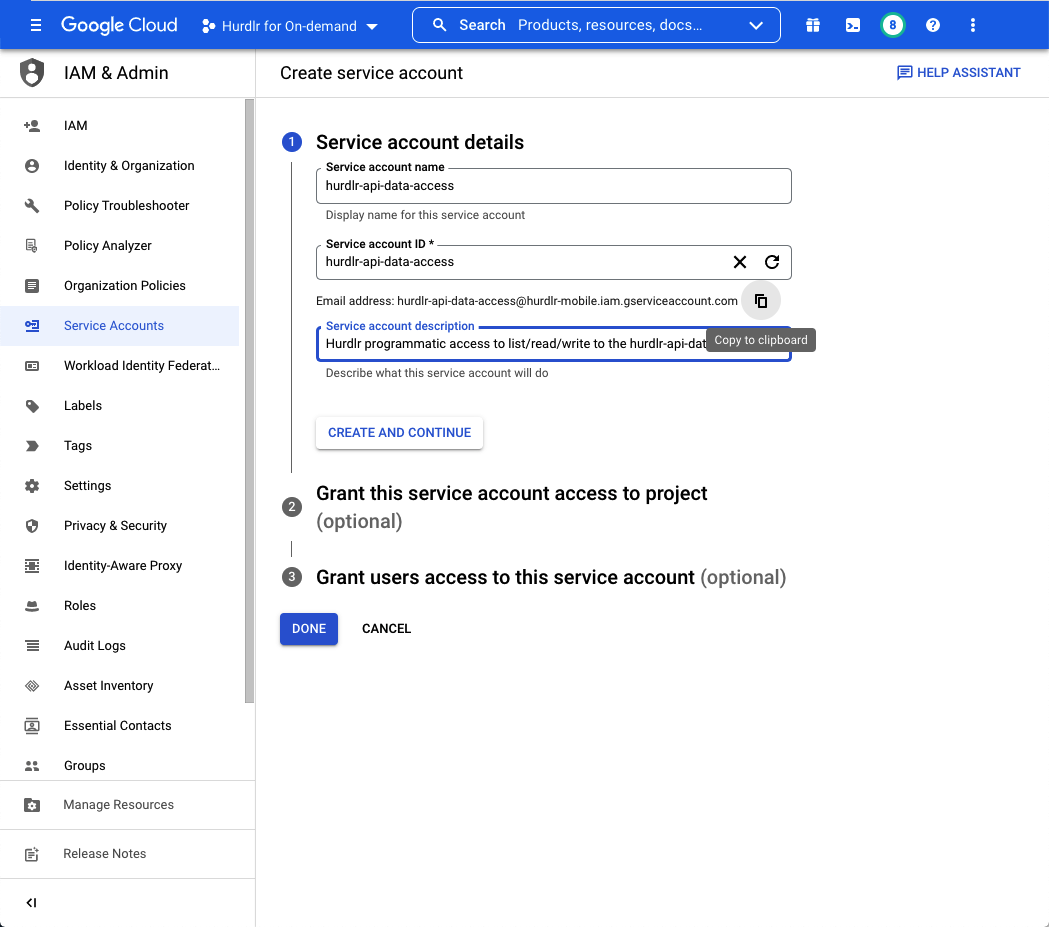
First, you'll need to create a service account to grant programmatic access to the Google Cloud Storage bucket that we will create.
The first step of the "Create service account" flow will require you to input a Service account name and Description. We recommend setting the Service account name to "hurdlr-api-data-access".
You should then click "Copy to clipboard" below the "Email address" that it created. Then, click "CREATE AND CONTINUE" followed by "DONE":
2. Create a bucket
The next step to configuring your Hurdlr API data lake is to create a Google Cloud Storage bucket to store Hurdlr API data. We recommend naming this bucket "hurdlr-api-data":
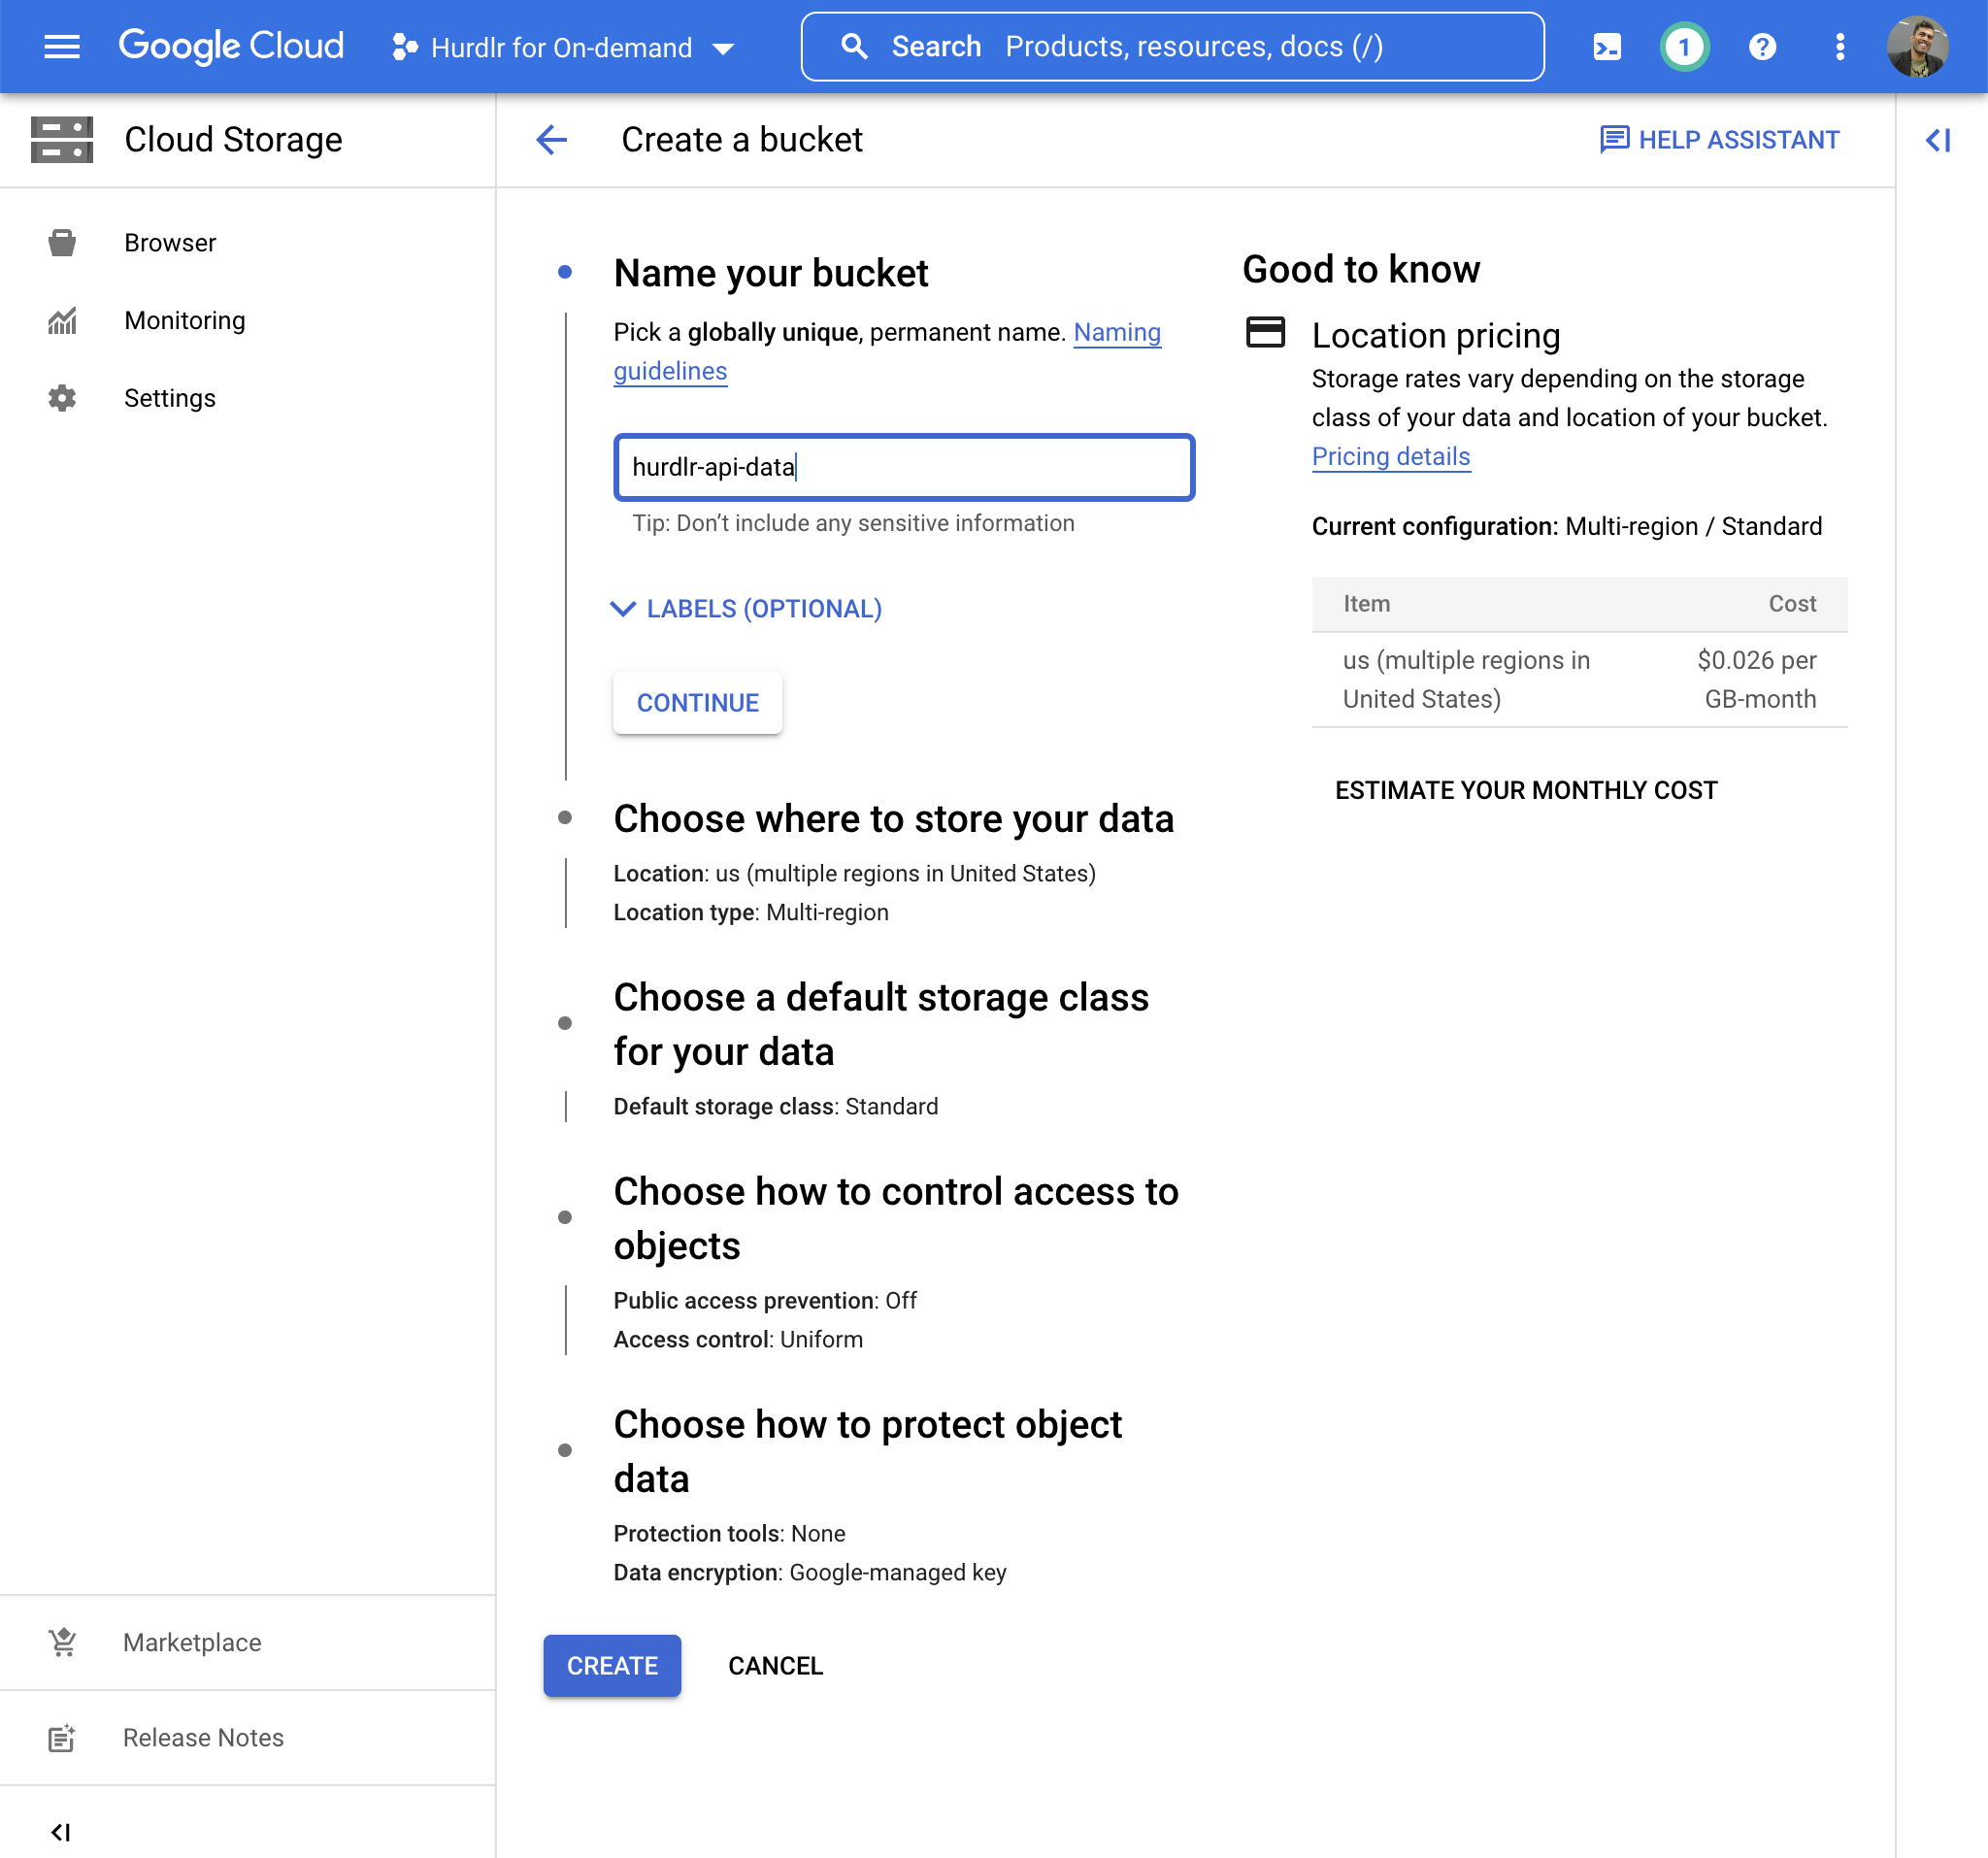
For the next two steps, "Choose where to store your data" and "Choose a default storage class for your data", you can stick with the default values.
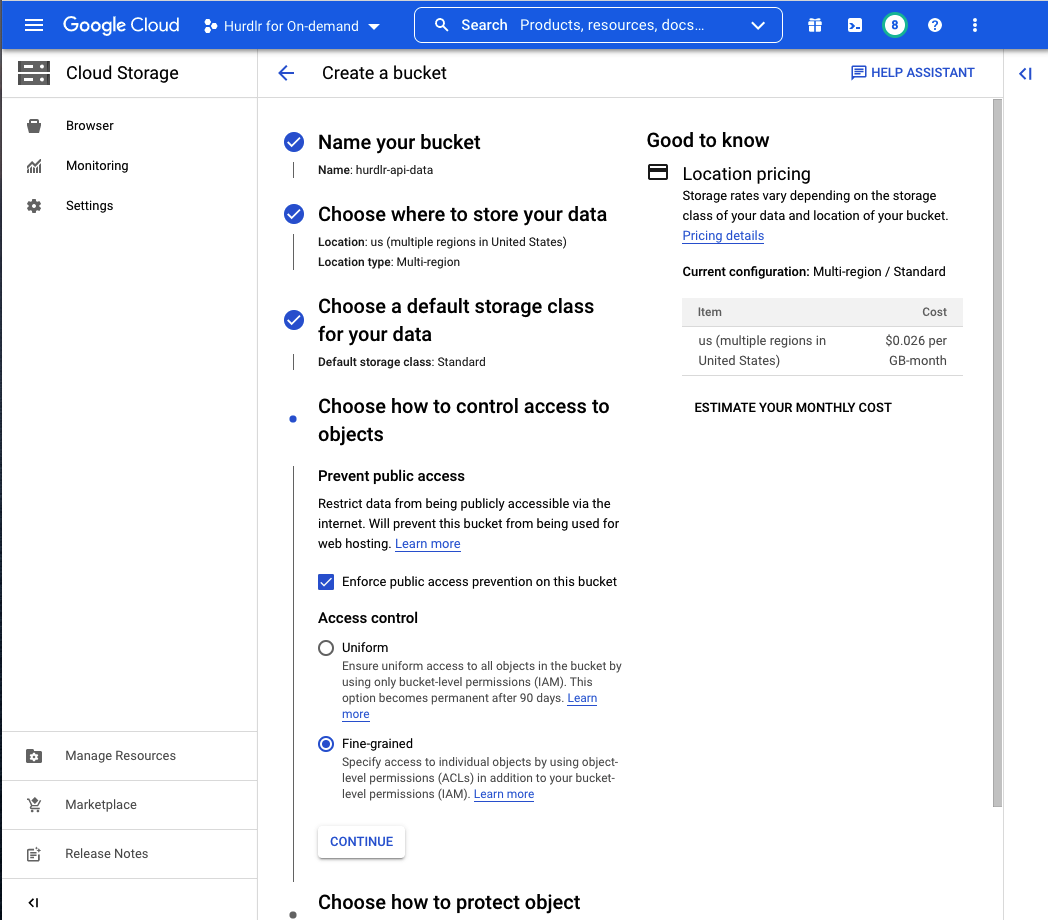
For the "Choose how to control access to objects" step, you can select "Enforce public access prevention on this bucket" and "Access Control: Fine-grained":
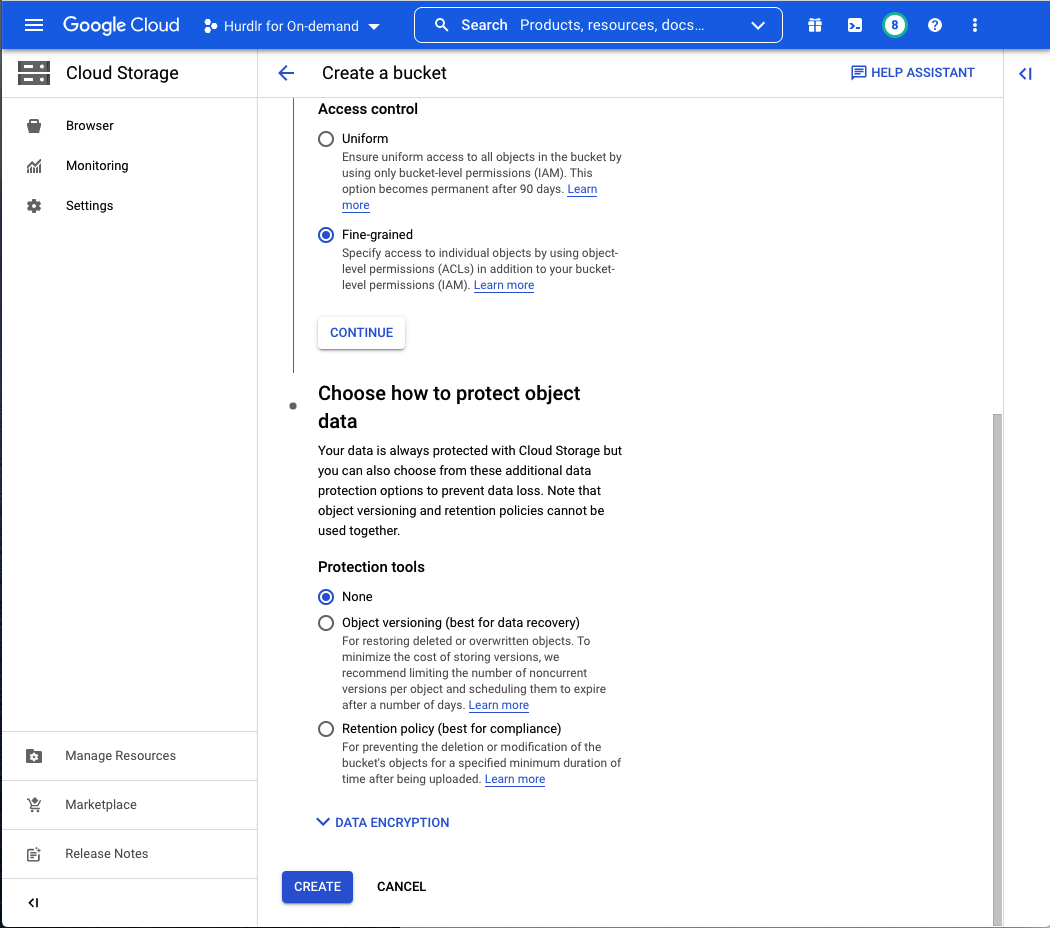
For the "Choose how to protect object data" step, you can use "None". If your data and/or compliance teams prefer that the Data Lake has some recovery options, you can select one of the other options, but please be aware that these options will increase your data storage cost.
Then, click "CREATE":
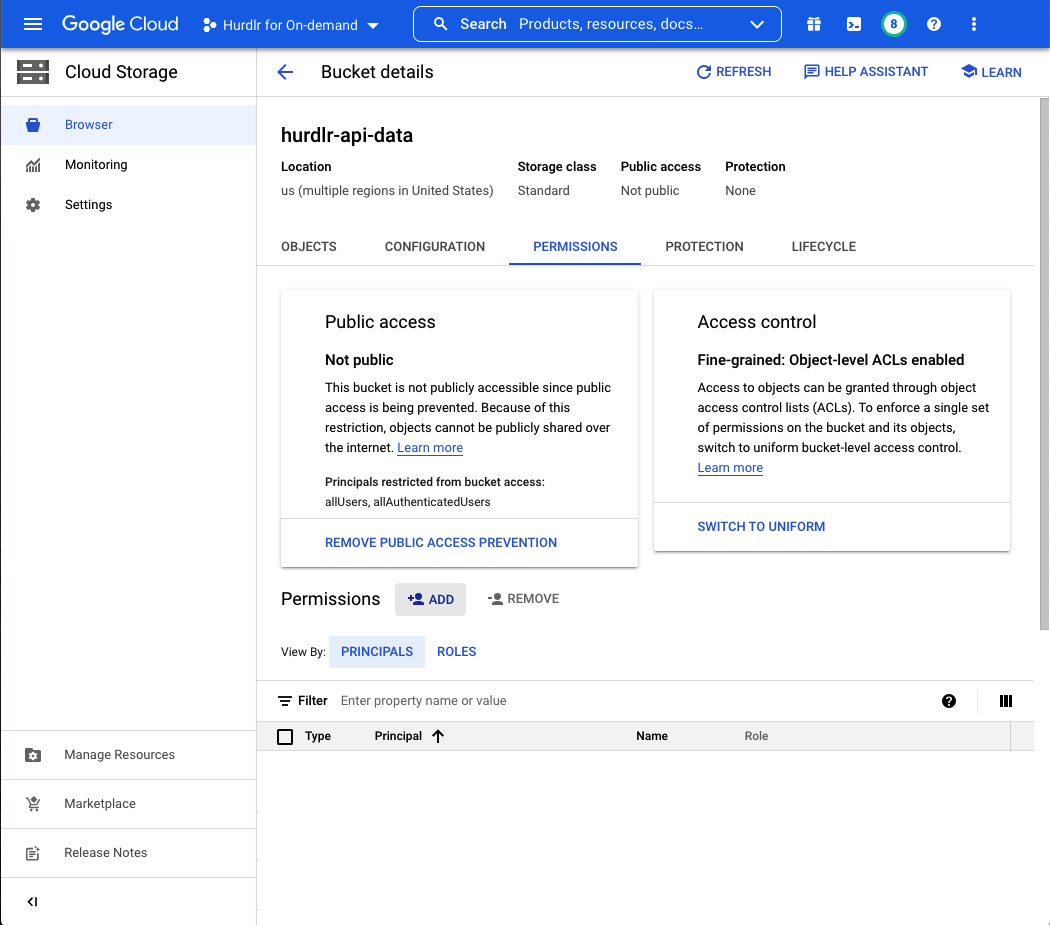
Once the bucket is created, you will be taken into the "Bucket Details" screen for the "hurdlr-api-data" bucket. You should click on the "PERMISSIONS" tab and then click on the "ADD" button:
In the New Principals field, you can paste the email address that you copied to your clipboard in Step 1, and then set the Role to "Cloud Storage: Storage Object Admin":
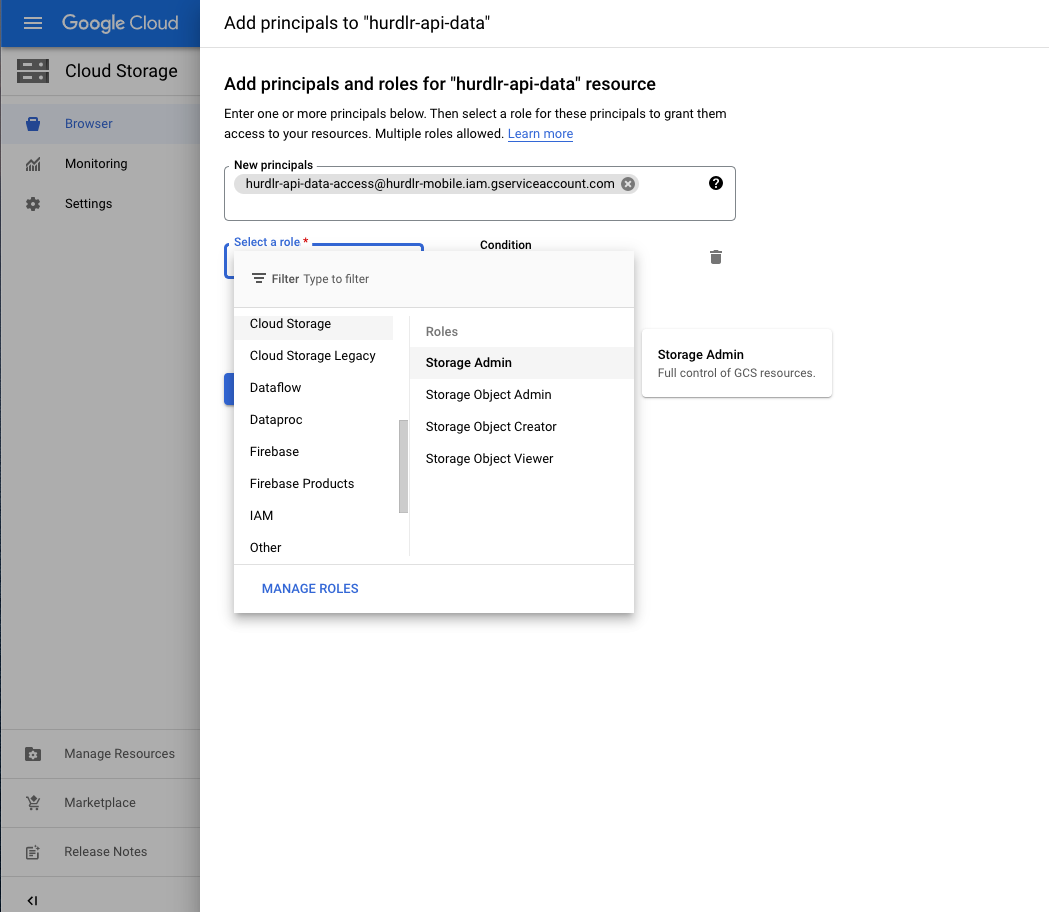
Finally, click "SAVE".
3. Add a service account key using the new service account
Next, you'll need to create a service account HMAC key using the new service account created in Step 1.
From the "Cloud Storage" screen, you should click on "Settings", and then select the "Interoperability" tab:
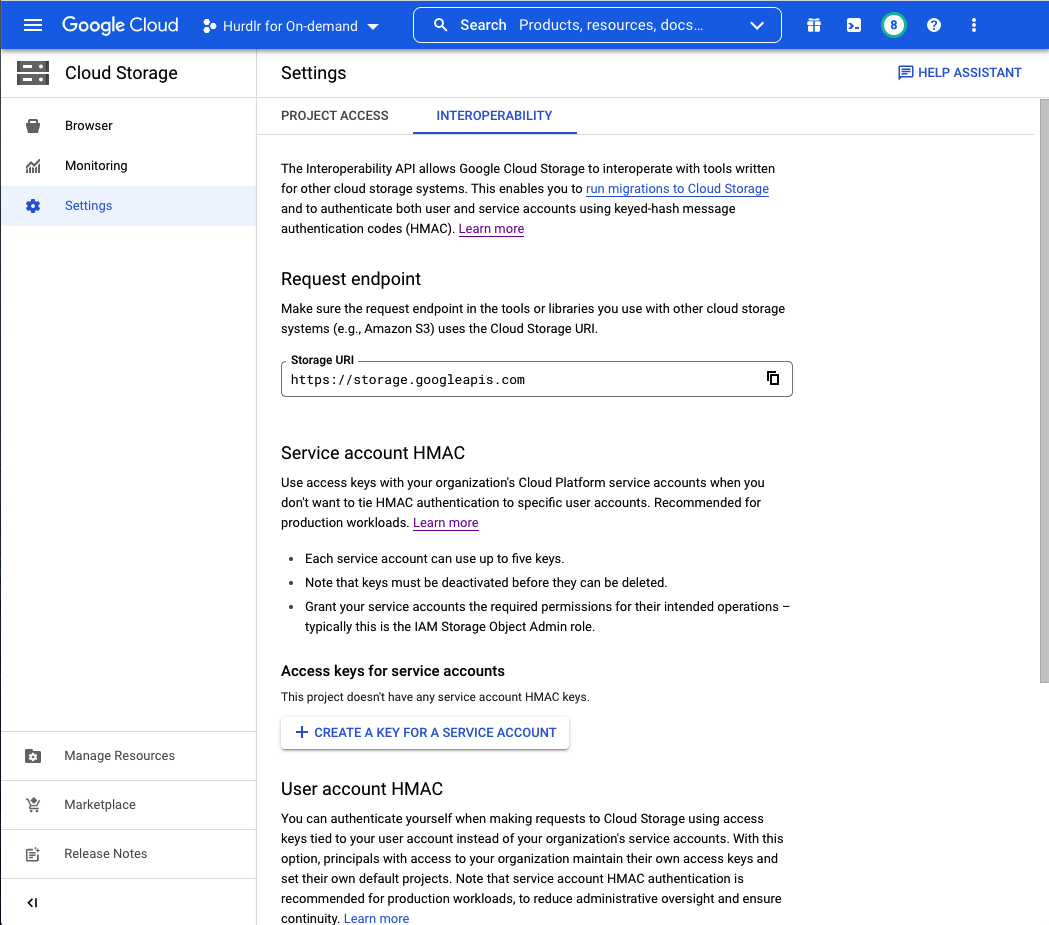
You should click on the "CREATE A KEY FOR A SERVICE ACCOUNT" button, and then paste the email address that you copied to your clipboard in Step 1, and then select the row for that account:
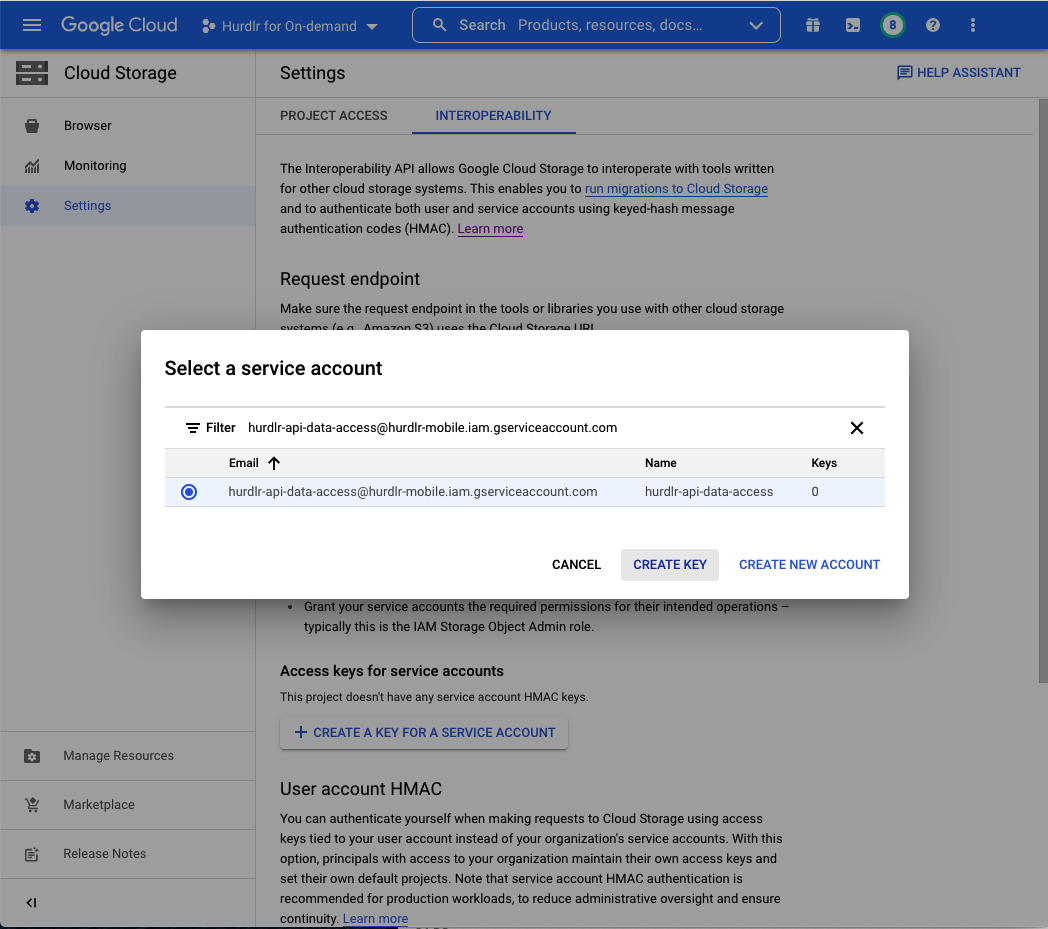
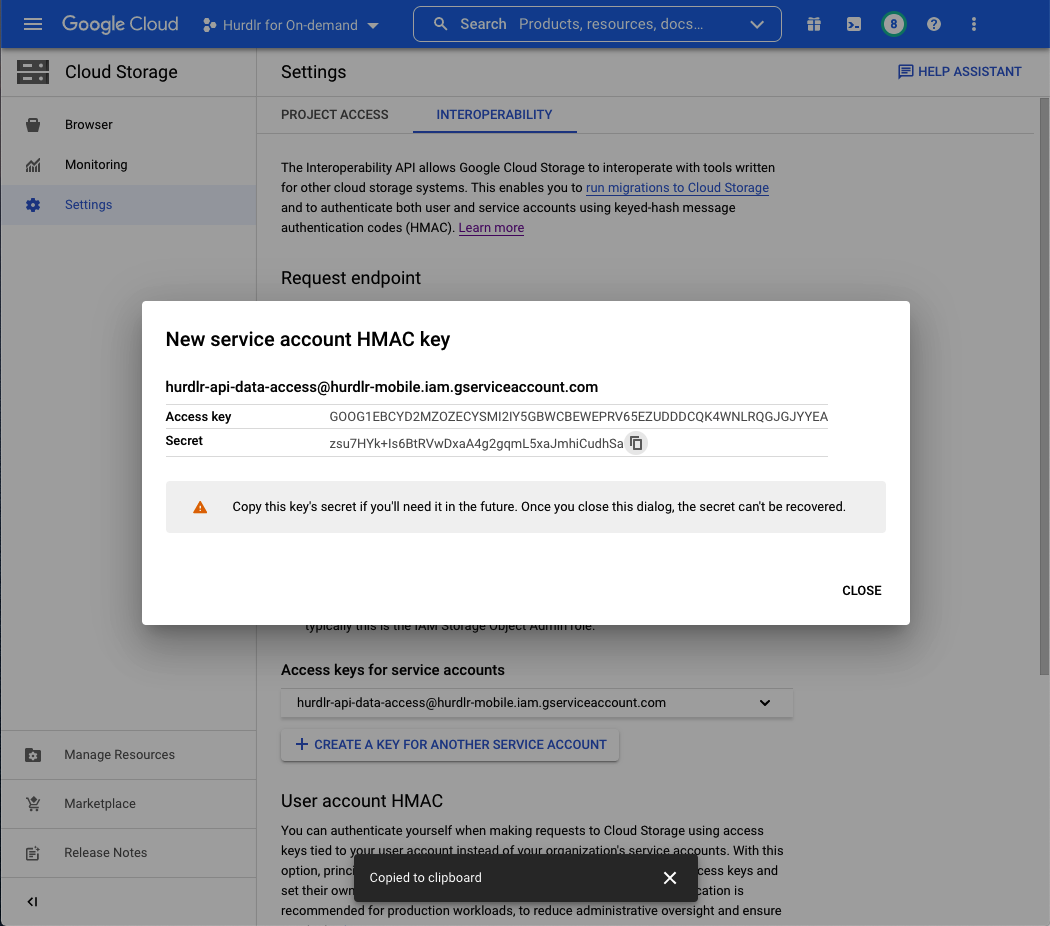
Finally, click "CREATE KEY", which will yield a screen displaying the new HMAC key. You should then copy both the Access key and Secret fields that are displayed, and paste them into your own text file:
4. Securely share access with Hurdlr
Contact us directly at [email protected] for instructions on how to securely share the Access key and Secret that you generated at the end of Step 3.
Updated almost 2 years ago
